Want to produce algorithm-friendly YouTube content?
Wondering how to attract viewers and keep them watching?
In this article, you’ll find 15 tips and tactics for optimizing your YouTube video content at every stage of the video production process. 15 Tips for Growing Your YouTube Channel by Jeremy Vest on Social Media Examiner.
#1: Commit to Posting to YouTube Multiple Times Per Week
Recent reports have shown that YouTube channels that post more than
once a week are performing much better and getting more recommended
views. If possible, post a video to YouTube three or more times per week,
especially if you’re just starting out and trying to build an audience.
Keeping a regular schedule with multiple posts per week can quickly
raise your channel in the algorithm.
Creating a ton of content in the beginning on similar topics will help your channel perform well in the algorithm, and also create a library of content that will usher viewers from one video to another, boosting your watch time and giving them a reason to subscribe.
#2: Develop a Sustainable Video Production Workflow
You might be making Oscar-worthy short films and videos, but if each
video takes 6 months to produce, your videos aren’t going to grow your
YouTube channel. Regular video uploads at familiar times are what bring
people back for more.
Whatever kind of videos you want to make, choose content that you can develop and create on a regular basis and find ways to streamline your production workflow,
whether it’s setting up a studio, creating an editing template, or
hiring assistants or a production team. Keep refining your topics and
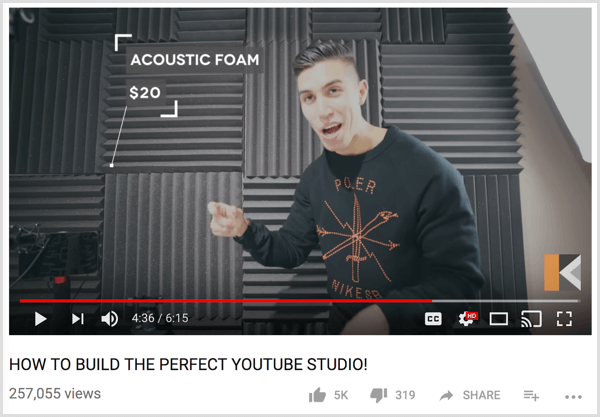
production workflow until your process is a well-oiled machine. Tip: One of the best things you can do is set up a small video studio so when it’s time to shoot, you can simply turn on the lights and get started.
Learn how to become the top expert in any industry with this new online course.
How you hook viewers depends on you and your content. If a video features a project of any kind, show the end result first.
A stunning result makes people more interested to see how you achieved
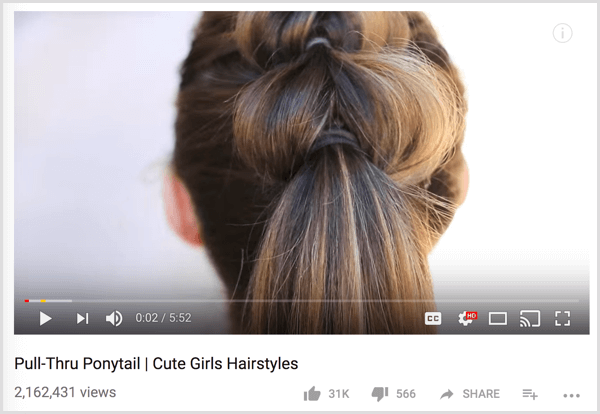
it. This approach is great for DIY and makeover videos. For instance, Cute Girls Hairstyles always begins by showing the end result before explaining how to create a hairstyle.
Stories are another way to pique viewers’ interest. People are hardwired for stories. When you start your video with a story,
people will naturally want to stick around to see what happens. Plus,
personal stories endear the presenter to the viewer and can often
provide a helpful segue to more complicated ideas.
To demonstrate, Michael from VSauce is a master at starting his videos with an intriguing story or idea that leads into the subject matter.
However you hook viewers, make sure your opener relates directly to the subject matter. Viewers clicked because they were interested, so quicklyget into the subject they wanted to hear about in the first place.
You may have seen YouTubers create intrigue by starting with a story
or fact that seems completely off-topic and then connecting it to the
topic. This tactic works best when you already have a large audience
that trusts you.
#4: Keep Titles and Opening Credits Short
Attention spans are short. A long title or credit sequence at the
beginning of a video can cause people to lose interest. Also, a long
opener discourages binge watching because people don’t want to watch the
same long sequence over and over.
Instead, make your opening title and credits short and punchy. Make the whole opener no longer than 5 seconds. As a great example, Crystal Joy’s title sequence is short, sweet, and delightfully quirky.
#5: Add End Screens to Promote Your Videos, Channel, or Website
End screens are interactive graphics that link to another video,
playlist, channel, or web page, or prompt someone to subscribe to your
channel. As the feature name suggests, you can add end screens only in the last 20 seconds of your video, so you have to plan where the end screens will appear.
One option is to frame the subject of your video in such a way that you have room for end screens. Talking over the end screen will continue to engage the viewer.
Or you can add a slate with an image or logo where you can place the end screens. This option is useful if you don’t want the end screen to interfere with your content.
End screens tend to work best if the on-screen presenter is still
talking and giving information to the viewer. If you just cut to a
screen with a color or design and no new information, viewers are likely
to click off of the page. YouTube viewers are somewhat conditioned to
do that now. If you continue to provide information, it will give viewers a reason to stick around. Extend Session Length With a Video or Playlist End Screen
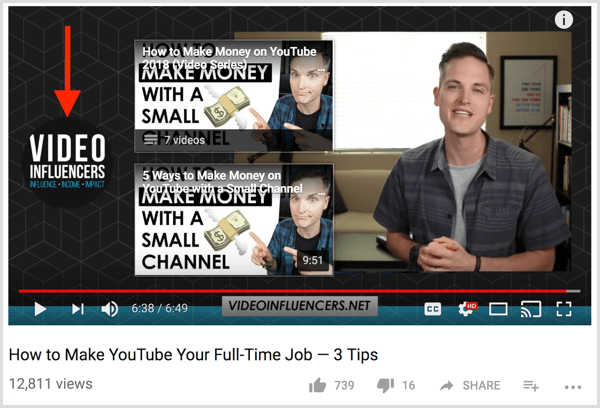
Because YouTube wants to keep people on the platform, session length
is important to the algorithm. Session length is the amount of time a
viewer spends watching videos. If you add to session length by sending
viewers to another YouTube video or playlist (even if it’s not one of
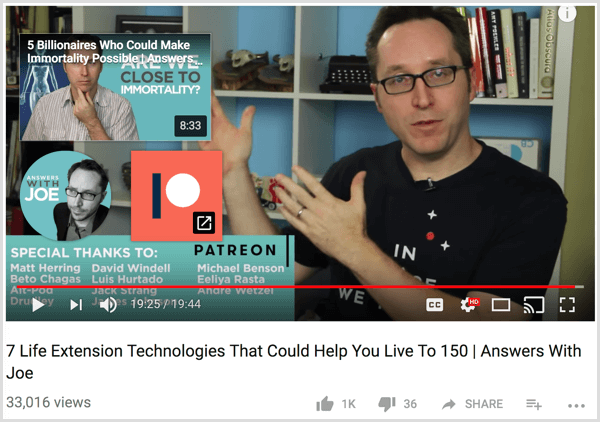
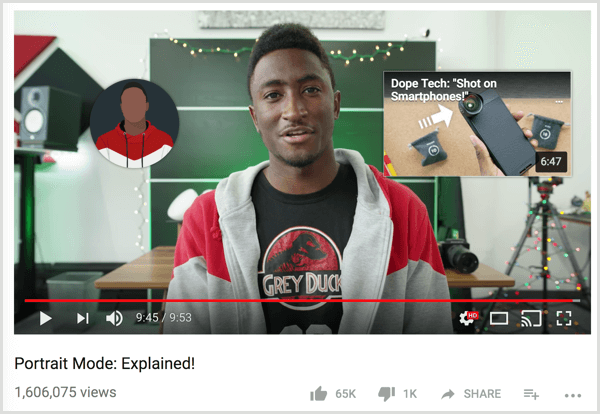
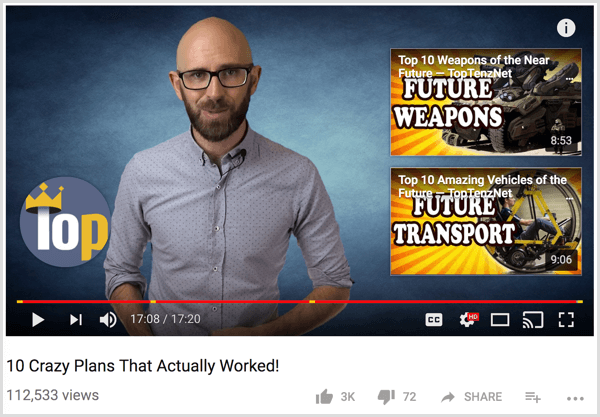
yours), your video will be boosted in the algorithm. Put some thought into where viewers will go after watching your video and send them there via end screens (and links in the video description). Marques Brownlee
does a good job of leading people from his video to another video on a
similar topic through end screens like the one shown here:
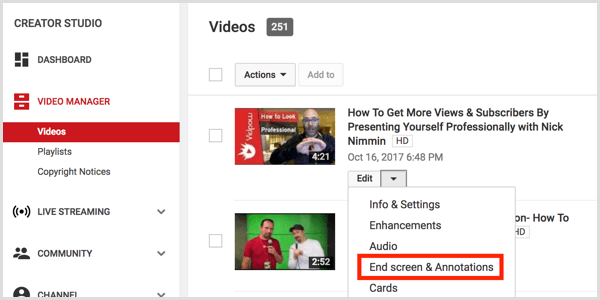
To add an end screen in Creator Studio, open Video Manager, click the drop-down arrow next to the video to which you want to add the end screen, and select End Screen & Annotations.
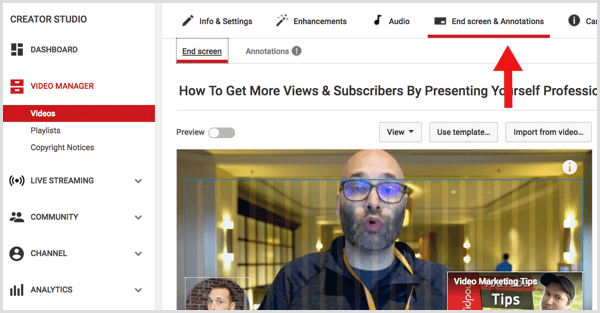
Another way to get to the Info & Settings screen is to click any
of your videos in Creator Studio and select End Screen & Annotations
at the top of the page.
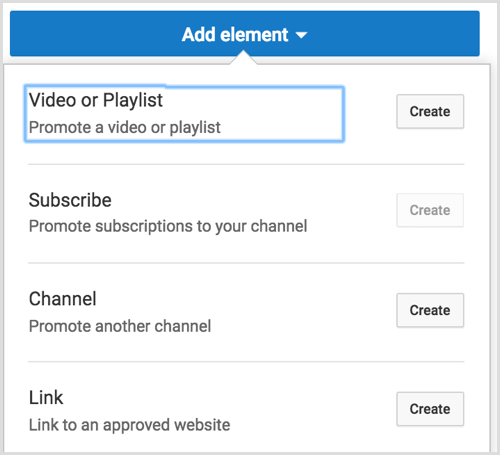
On the End Screen & Annotations page, the timeline will automatically snap to 20 seconds before the end of the video. To add an end screen that will extend session time, click Add Element and then click the Create button next to Video or Playlist.
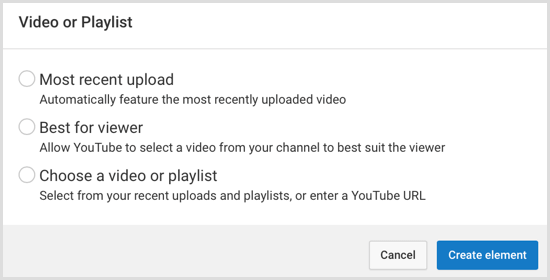
Next, choose from one of three options for adding your playlist:
Most Recent Upload will link to your most recent video.
Best for Viewer will let Google select the best video based on the viewer’s past viewing habits.
Choose a Video or Playlist lets you choose the video or playlist where you want to send the viewer.
Research has shown that Best for Viewer works really well. That’s not
surprising because this option is based on the person’s individual
viewing habits. But if the video is part of a series, make sure you
point viewers to the next video in that series or to a playlist so they
can watch the entire series in sequence. Promote Your Channel or Website With Subscription, Channel, or Linked End Screens
If you add a video or playlist end screen, you’re also able to add
other types of end screens. As shown above, you can add a subscribe,
channel, or linked end screen. (Note that if you want to show only a
subscribe link or a link to your website on the end screen, you’re out
of luck. You must include a link to a video or playlist.)
A subscribe end screen will insert a link for people to subscribe to your channel.
This end screen is round and by default shows your profile picture.
There’s really no reason not to include a subscription button.
Make sure you point viewers to the subscription button in some way,
because nothing on it tells the viewer what it is. You can explain what
the subscription end screen is by talking on-screen or including a
graphic that explains the end screen’s purpose.
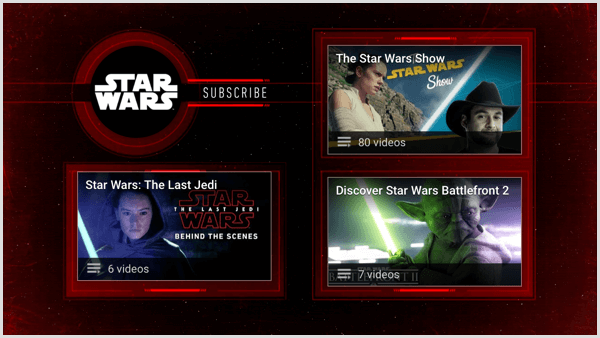
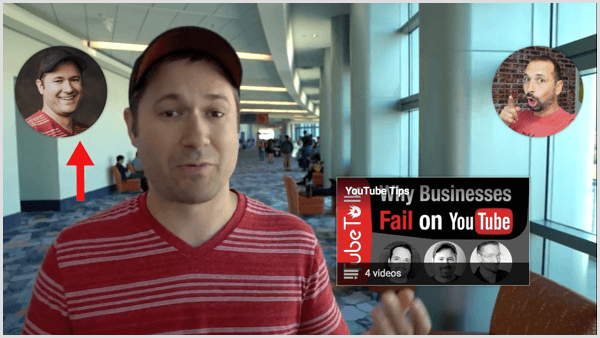
A channel end screen lets you promote another channel,
which is especially useful in collaborations. If the video is a
collaboration with another creator, you can link viewers to their
channel as well as your own, as shown in the example below. If you just
want to point people to a channel you admire, you can do that, too.
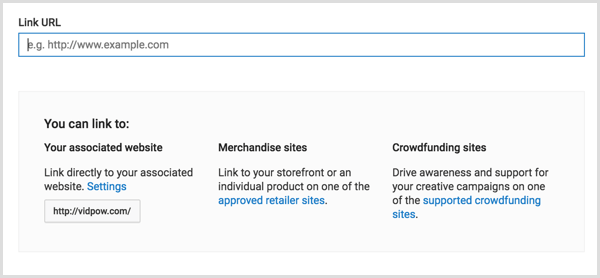
A linked end screen allows you to add a link to an associated website, including merchandising sites, crowdfunding platforms like Kickstarter or Patreon, or your own website.
An associated website needs to be one you own, and YouTube has a process for setting up an associated site. After you set up your website with YouTube, you can send viewers literally anywhere via redirects. Plugins for WordPress make creating the redirects easy.
As a general marketing rule, the more calls to action (CTAs) you
provide, the less likely people are to choose any of them. Thus, it’s a
good idea to add no more than three linksto your end screen. Tip: As you think about what end screens to use, focus on your goal for the video.
Do you want to get more subscribers? Boost your channel in the
algorithm? Sell something? Having a goal in mind from the beginning is a
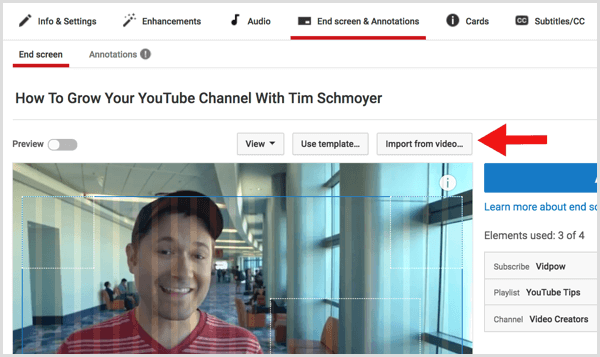
good habit to develop. That way you can craft your video and optimization around that goal. Import an End Screen Template From a Previous Video
After you refine your end screen strategy, you can save time by
importing a template from a previous video. All you have to do is click Import From Video and select the videofrom which you want to import end screens. This feature makes applying end screens fast and easy, especially if you have an end screen template that performs well.
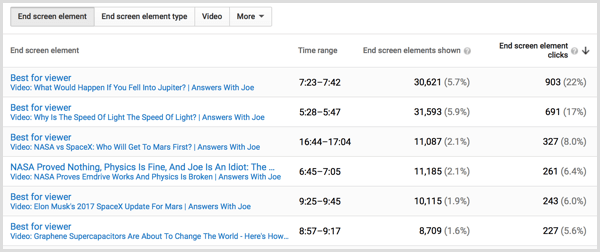
To monitor the success of your end screen elements and refine your strategy based on your data, open Analytics in Creator Studio and select End Screens to see which perform best. Then, obviously, do more of what works.
Adding End Screens Versus Annotations or Cards
Until very recently, the effect you created with end screens was
built through annotations. Because annotations are burned into the
video, you can’t edit them later. Also, annotations don’t work on
mobile. However, end screens are mobile-friendly and YouTube will likely
phase out annotations altogether in the coming years. YouTube cards are different from end screens in that you can use them to link to something in the middle of the video. Indeed, YouTube says cards are suppressed while an end screen appears.
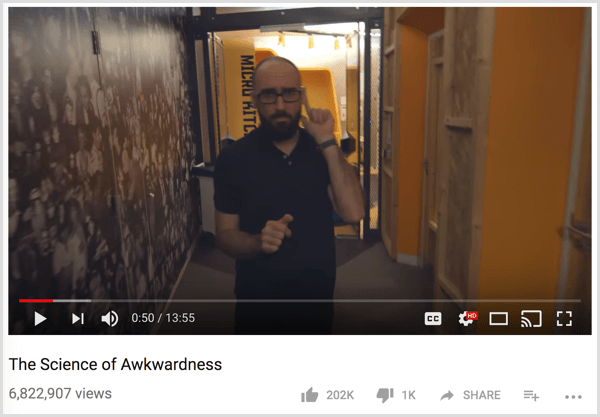
#6: Edit Distractions Out of Your Video
Long pauses, meandering talking, bouncing from one subject to
another, or just being boring can make people start looking at the
recommended videos for something more interesting. Keep tangents to a minimum, and if you do veer from the topic, make sure it’s engaging either visually or with a story. Don’t give viewers a reason to click away.
To simultaneously avoid distractions and keep your videos fast-paced and engaging, you can quickly cut from one shot to another like Devinsupertramp. To create cuts, you don’t necessarily need to film with multiple cameras. You can also use text or transitions that come with basic video editors.
#7: Design Video Thumbnails YouTube Users Want to Click
Thumbnails, more than any other factor, can make or break your success on YouTube. Why? Suggested videos.
Suggested videos are the leading source of organic traffic on
YouTube. As someone is watching a video on YouTube, your video thumbnail
needs to stand out when it’s a suggested video in the right sidebar.
When your video appears as a suggested video, YouTube is basically
endorsing it by saying that someone watching some other video might
enjoy your video as well.
Moreover, if your video attracts clicks as a suggested video, its
clickability is likely to register with the YouTube algorithm. Remember
that more than anything else in the world, YouTube wants viewers to
click another video. So they’re going to recommend videos that are most
likely to get that click. Deliver on the Thumbnail’s Promise
First and foremost, make the thumbnail relevant to
the video’s title and content. Nothing makes people click away faster
than a video that has nothing to do with the thumbnail. Viewers feel
tricked. You’ll not only alienate your audience, but you’ll also have
low watch time, which the YouTube algorithm values most of all. Make Viewers Wonder What’s Next
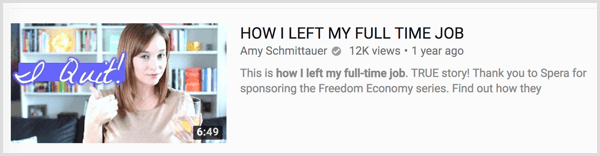
Try to tell a story with your thumbnails. Show an image that sets up or teases a situation. Make the viewer wonder what happens next, or what happened before. This Amy Schmittauer
thumbnail with the words “I Quit” tells a story that complements the
video title. If you can feature an image that contains some action or
movement of some kind, even better.
Keep in mind that thumbnails are only half of the story. The other
half is the title. A clever juxtaposition of title and thumbnail can go a
long way toward increasing viewer interest. Design Small
Many people create 1280 x 720 pixel video thumbnails as YouTube recommends.
The images look great, but nobody ever sees a thumbnail at that size on
YouTube. Although you want the pixel size to follow YouTube’s
recommendation, you still have to design the imagery for a smaller viewing size.
To check how your thumbnail will really look on YouTube, always zoom out so you view the image on-screen at the size that it will appear on YouTube. You want to make sure the thumbnail image still makes sense and stands out when it’s the size of a postage stamp.
If not, a few simple image edits might help. Try cropping the image to a smaller area or making the colors super-saturated, as in the example here. Also, the Sharpen tool can define the edges of your image. At a large size, these edits might look bad, but at the size viewers will see, your image will stand out. Create a Consistent Look and Feel
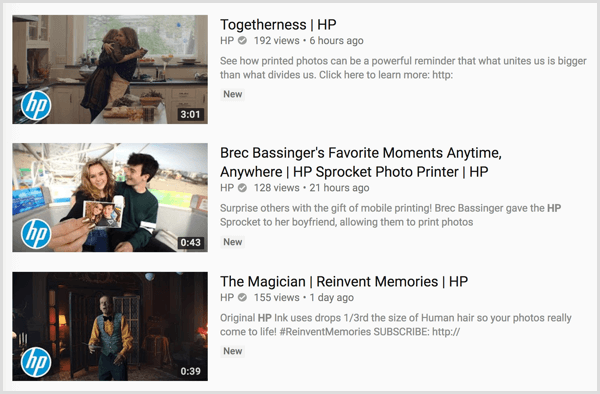
When all of your thumbnails have a consistent look, people can
recognize your videos at a glance. This consistency might include a
similar text font, a logo, familiar colors, a shape or design element,
or the same person’s face. Whatever you choose, find something
consistent and stick with the style on all of your thumbnails.
Consistency is powerful because it teaches people to look for that
familiar element in your thumbnails, and if they like your content,
they’ll be more likely to check it out. By adding a logo in a specific
place, HP’s video thumbnails stand out at a glance:
Becoming Well-Known (May 4 - June 12, Online Event)
What could you achieve if more people heard
your message? Imagine building a name for yourself and becoming more
well-known. It's times like this that present an opportunity for you to
make a bigger impact on the world. If you want to be more known but
don't know how, check out the new course from SME founder Michael
Stelzner: Becoming Well-Known. He's mentored and advised dozens of
industry pros, including Amy Porterfield, Mari Smith, and Pat Flynn. Let
Mike guide you through his proven process to Becoming Well-Known.
Be Emotional
Excitement is the emotion that people respond to most. When we see
someone showing enthusiasm, it makes us want to know why they’re excited
and maybe join in so we’ll feel excited, too.
Nothing sells enjoyment more than the eyes, so show an excited face and focus on the eyes. Your video will get a much better response.
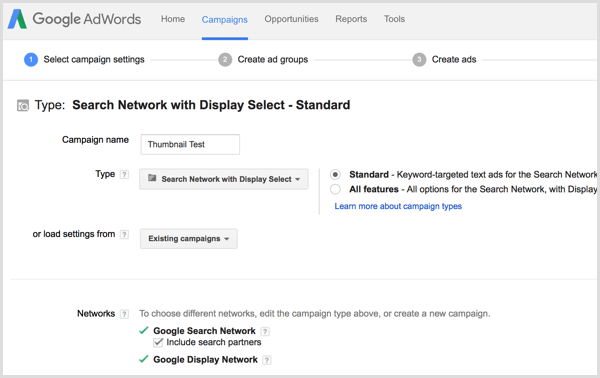
#8: Test Thumbnail Options With AdWords
Ultimately, you won’t know if a thumbnail will work unless you test it. Create several options to test your thumbnails with Google AdWords.
Then spend $10 per day for about a week to see which thumbnail gets the highest view-through rate (VTR). This tactic is especially worthwhile if you’re running a campaign or taking advantage of a tentpole event.
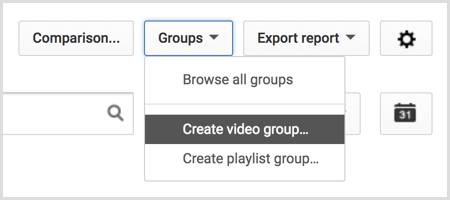
In YouTube Analytics, the Suggested Video views can help you check on the success or progress of your thumbnails. To group the videos you want to test, open Creator Studio and go to Analytics > Overview. In the top right, click Groups and select Create Video Group from the drop-down menu.
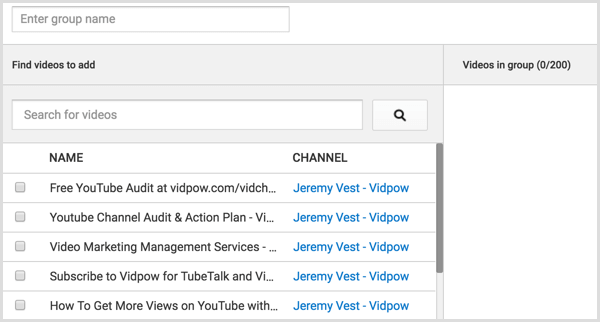
From there, you can create a group of similar videos.
Next, select Traffic Sources in the Analytics area and then Suggested Videos to see which video in your group performed best. Find similarities between the top-performing videos, build those elements into future thumbnails, and see how they work. You can learn a lot through this process.
#9: Replicate Topics or Tactics From Top-Performing Videos
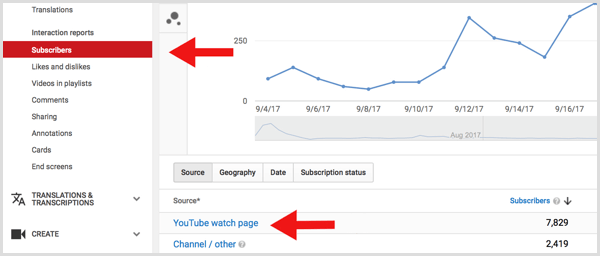
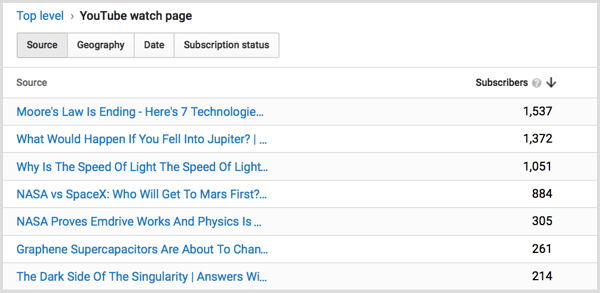
There is no substitute for nose-to-the-grindstone research. Take a deep dive into your analytics to find out which videos get the most subscriber conversions per view. Look for patternsamong them, such as subject, delivery, or editing style. Then make more videos like that.
To find your highest-converting videos in Creator Studio, go to Analytics, click Subscribers, and then click YouTube Watch Page.
In the list that appears, see which videos attracted the most subscribers.
If you want to get more detailed, you can get a subscriber ratio by
dividing the number of subscribers by total number of views for each
video. Be aware that the number will be really low because most people
subscribe on the channel page.
#10: Create Long Videos to Improve Watch Time
Although you want to keep your credits short, make your actual video content as long as makes sense for your topic.
Making long videos seems counterintuitive, given the famously short
attention spans online. Indeed, shorter videos were considered better.
But today, longer videos equate to more watch time, which boosts your
content in the algorithm.
Ultimately, the right length for a video is just long enough to get all of the information across without padding your video.
Don’t make a video longer just for the sake of making it longer because
you’ll lose viewers. But you do want to develop your video content with
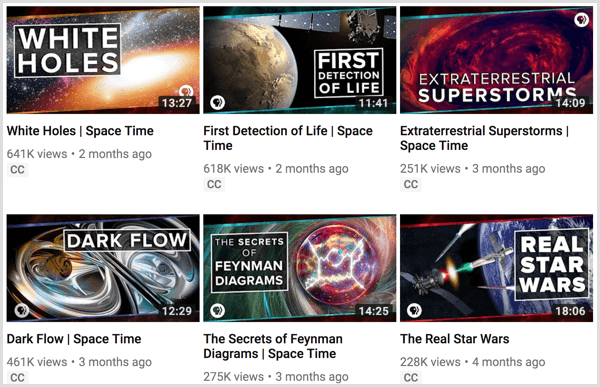
longer videos in mind. In general, videos from 7-15 minutes tend to
perform best. PBS Space Time
is a popular channel with many videos that fall into the general range
of 7-15 minutes, but also has longer videos that go almost 20 minutes.
You even find channels that regularly post 30-minute videos.
Understanding Watch Time Watch time
basically means the amount of time people spend watching your videos.
The YouTube algorithm values watch time because YouTube believes that
people will watch a video longer if it’s high-quality. If the video is
low-quality or misleading, viewers will quickly click away.
When you audit your channel,
the Audience Retention metric tells you the watch time for individual
videos. Videos that have high audience retention will be promoted in the
algorithm, and channels with high watch time (meaning their videos
consistently get higher retention) will see their videos given more
prominence on the platform.
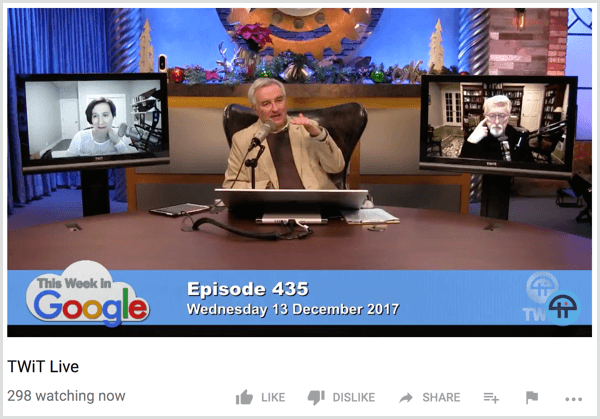
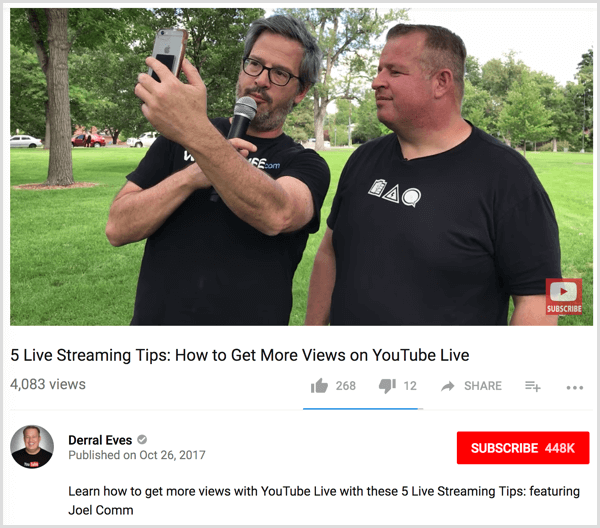
#11: Go Live on YouTube
Live-streaming
is a great way to pump out content without spending a ton of time on
it. Although live-streaming has a definite learning curve, after you’ve
mastered the format, live video is the easiest way to create video
content.
Live-streaming is heavily supported on all social media platforms. (On YouTube, the live video feature is YouTube Live.)
This video format provides excellent engagement opportunities because
you can communicate directly with your audience. Live video also has
long watch times.
To start sharing live video, you can use your smartphone or webcam for live broadcasts. Even relatively inexpensive webcams can still provide high-quality video.
#12: Use Three Types of Videos in Your Content Mix
With the “Hub, Hero, Help” strategy, you post videos that have one of three goals: serving the community around the channel, being shareable, or performing in search. You add these videos to your content calendar at various intervals: post hub videos monthly, hero videos quarterly, and help videos weekly.
Hub videos are community-focused and designed to create a strong bond among your viewers and you, and your viewers and each other. In hub videos, you might respond to comments, answer questions, interact via live video, initiate projects that require viewer participation, or share personal stories that give fans a behind-the-scenes peek at your channel.
Hero videos are tentpole videos that are designed to be very successful. These videos often focus on topical subject matter like holidays and news events.
Put extra effort into a hero video to increase the likelihood that
people will share it on social media and/or blogs, and that other media
pick it up.
Help videos are designed to have highly searchable content that provides actionable value. For example, create DIY, how-to, advice, and troubleshooting videos. For these, focus on search intent for discoverability.
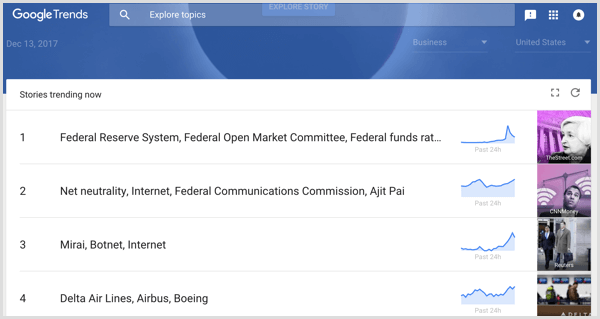
For help choosing topics for both hero and help videos, Google Trends is an excellent resource for trending topics and highly searched content.
#13: Develop Videos as a Series
Nothing increases watch time like binge watching. Ultimately, you want to create a “lean back” experience for your viewers
to go seamlessly from one of your videos to the next. Series playlists
are one of the best ways to do this, and yet are an underutilized tool
on YouTube. To use them, however, you need a series.
You can develop a series based on content that has performed well.
Indeed, many successful YouTube channels have more than one series,
each with a special topic focus and even different thumbnail image
style. To illustrate, Roberto Blake uses one thumbnail style for unboxing and tech reviews, and another for tutorials:
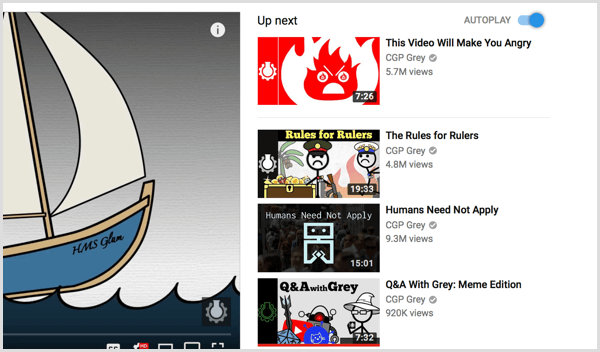
As you post videos in your series, you can add them to a series
playlist. When you use a series playlist, YouTube will automatically add
the next video in the playlist to the Up Next section at the top of the
recommendations. And if a viewer has autoplay turned on, the videos in
your series playlist will play one after another.
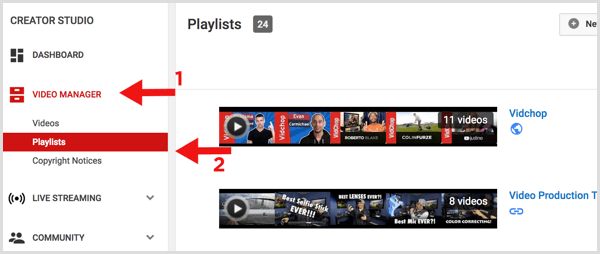
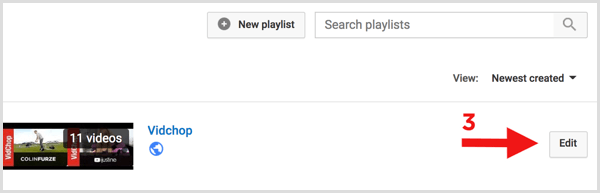
To change a playlist into a series playlist in Creator Studio, open Video Manager and click Playlists.
Then click the Edit button next to the playlist you want to change.
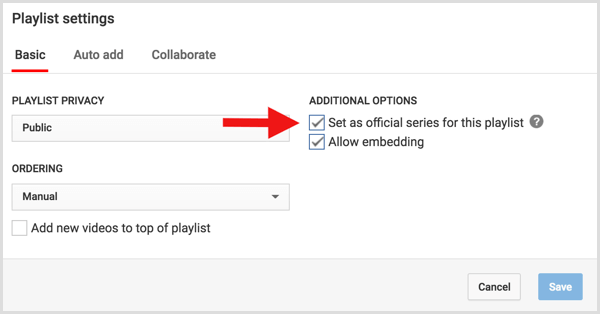
On the edit screen, click Playlist Settings near the top of the screen. In the Playlist Settings dialog box, select the Set as Official Series for This Playlist checkbox.
One note about series playlists: Although a video can be in as many
playlists as you want (and adding each video to at least three playlists
is recommended), a video can be in only one series playlist. So make sure your series playlists are high-level categories and get more specific on your regular playlists.
#14: Collaborate With Other YouTubers
Collaborations are videos that are shared among multiple content
creators and are one of the most effective ways to expand your audience
on YouTube. Whether you’re a brand or a YouTuber (or both!), working
with another content creator will expose your channel to people who likely would never have heard of you.
Social proof has a strong influence on people. When a content creator
collaborates with another creator, it’s an endorsement to their
audience. It can be just enough for a viewer to check out your channel,
and if they like your content, you’ve got a new subscriber.
People often forget that YouTube is first and foremost a social
network. And some of the largest creators got popular by cross-promoting
and working together. So while it may be easy to let your competitive
side take over when you see a channel getting more attention or growing
faster than yours, try to see their growth as an opportunity for you to
grow along with them.
But you can’t collaborate with just anyone. You need to consider some
finer points of collaborations when looking into this tactic to grow
your channel. Find Channels With Similar Audiences But Different Content
You want collaborators who have similar audiences but different content. Ask your viewers who else they enjoy watching and look for names and shared videos in the comments.
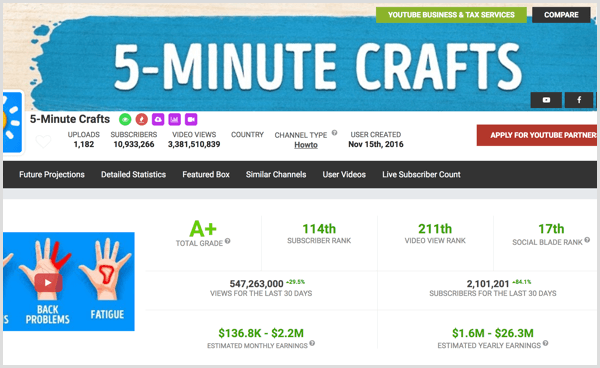
Also, tools like Social Blade can help you identify a channel’s size and demographics and find who’s serving the same audience as you. The metrics you want to look for include age, gender, interests, location, and engagement.
The most successful YouTube collaborations are with channels that
have a similar audience but cover entirely different content from yours,
because the audience won’t get a repeat of your subject matter on their
channel. The fact is that all of us have multiple interests, including
your audience. So anywhere you can find overlap is a great opportunity
for growth.
For instance, a science education channel might share an audience
with a sci-fi movie channel. A gaming channel might share an audience
with a tech review channel. A family channel might share an audience
with a toy review channel, and so on. Look for Channels That Are the Right Size
Generally, you want to find channels that are slightly larger than yours, but not too big.
Super-large channels are asked to do collaborations all the time and
usually work only with people they know (so get to know them if you
can!).
Working with a smaller channel can be great if they’re a good fit and
especially if they’re growing fast, because today’s tiny YouTuber could
be tomorrow’s big breakout star. Team Up With Multiple Creators
Collaborations don’t have to just be two-person deals. Multiple
creators can come together for videos and gain exposure to multiple
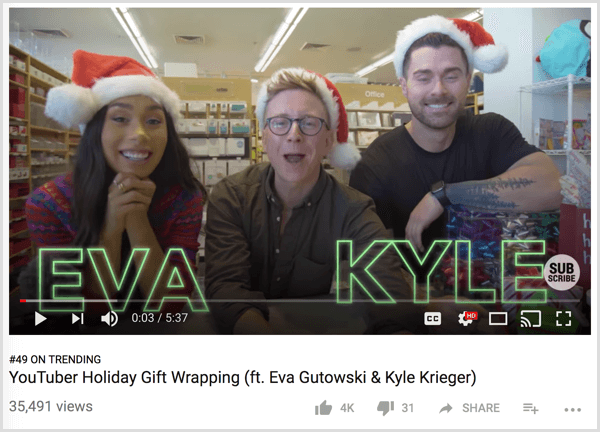
audiences. Tyler Oakley
often collaborates with other creators of various genres and has grown
his audience exponentially while developing relationships in the
process.
You’ll find the larger your channel grows and the more relationships
you form, the more opportunities for multiple-creator collaborations
you’ll have. Many of the largest YouTube channels do these all the time,
simply because these other creators become their friends and they hang
out together in real life. A rising tide truly lifts all boats.
Connections with other creators make YouTube the social media site it is, and through multiple-creator collaborations, you can form tight bonds and teams that work together to go much further.
Partner With People From Other Social Media Platforms
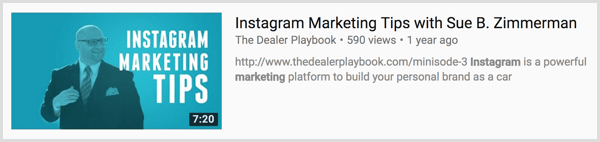
You can collaborate with people outside of YouTube, too. Instagram
stars, for instance, have huge followings and can direct their followers
to your YouTube channel. In this example, The Dealer Playbook, which talks about automotive sales and marketing, hosts Instagram marketing expert Sue B. Zimmerman:
Good ways to reach outside of YouTube are to look for bloggers, people with large Twitter followings, and Facebook pages. Anybody with a large or engaged following is a good candidate for collaboration.
#15: Promote Collaborations in the Video’s Title, Tags, and Description
You want your collaborator’s viewers to find your channel through them. So feature the collaborator’s name and face prominently in the thumbnail of the video. Add their name to the title, tags, and description. Also, make sure that your collaborators do the same for you in their videos.
The power of a collaboration is in the promotion, so don’t bury the lede. Highlight your collaboration partner front and center.
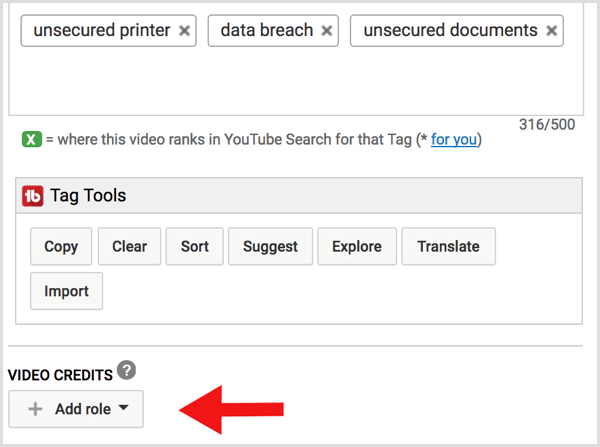
Also, at the bottom of your video’s Info and Settings page, you can add the other creator’s channel in the credits.
This connects your channel to theirs in the algorithm and can boost
your number of recommended views via their channel’s videos.
To find the credits field, scroll to the bottom of the Info & Settings page on your video, below the keywords field. Want more like this? Explore YouTube for Business! . Conclusion
To grow a YouTube channel, you need to develop YouTube content with
your viewers and the algorithm in mind. For viewers, make sure your
thumbnails grab their attention and deliver what you’ve promised. Start
your videos with a strong hook and edit the content to keep it
interesting. Overall, you want to create an experience that keeps
viewers watching.
Fortunately, attracting clicks and keeping viewers interested also
raises the visibility of your videos and thus your channel via the
YouTube algorithm. Interesting content that people click, and that leads
to a good watch time and session duration, can boost your videos’
visibility throughout YouTube. Playlists, collaborations, series, and
end screens also improve your odds. What do you think? Have you tried any of these tips or tactics in your YouTube videos? What did your results look like? Please share your thoughts in the comments.
If you want to grow your channel (like I do) you should create an auto-subscribe link.
Instead of just linking to your channel, these links will auto-prompt visitors to subscribe to your channel.
Using an auto subscribe link on YouTube is an awesome and effective hack to boost your subscriber count!
You can use this link anywhere that you would use your regular YouTube URL.
I have made sidebar images that link to the channel with the auto subscribe link and it has already shown tremendous results.
The process is fortunately, very easy.
Step #1 Locate Your YouTube Channel URL
Surprisingly, many people don't even know their YouTube channel URL! Bonus Tip:
Be sure to set up a custom YouTube URL as soon as possible. Currently,
you have to have certain metrics before you can do this, but it doesn't
take a whole lot. Click here to learn how to customize your YouTube URL.
Your current URL can be found in just a couple of steps.
1. Click on the icon in the top right corner of the YouTube page.
2. Choose "Settings" from the drop down menu
3. Choose "Advanced" below your name
4. There's your link!
Note: I've since moved the channel above. So that vanity URL is no longer linked to me.
Step #2 Combine Your Channel URL with Auto-Subscribe Tag
The formula is simple:
YouTube channel URL + "?sub_confirmation=1."
Remove the parenthesis of course 🙂
Your auto-subscribe link will look like this...